How to Use the Windows CSI Proxy and CSI SMB Driver for Kubernetes
The Windows CSI Proxy went GA in the last quarter of the 2021. The CSI Proxy provides a named pipe that can be mounted into a container running in Kubernetes that will allow that container to run storage commands on the Windows host. Linux doesn’t have this issue as containers can access the host directly when running as a priviledged container. Until HostProcess Containers progresses further and adoption increases this is a good solution to overcome that issue. I needed to create a test workload for verifying that CSI Proxy was working succesfully and I decided to do that workload without requiring running in a cloud environment. This meant that I needed to leverage a CSI driver that could be configured locally and that had CSI Proxy support. I decided that I would focus on the CSI SMB Driver which provided many of the resources being used in this post.
Requirements
To follow along you are going to need a Kubernetes cluster with at least one each of Linux and Windows worker nodes. On the Windows worker node you will need the CSI Proxy installed and running as a Windows Service. I will be using an RKE2 1.22.4-r1 cluster deployed using Rancher 2.6-head which will setup and configure the CSI Proxy for you automatically.
Add Helm Repo to Apps and Marketplace in Rancher
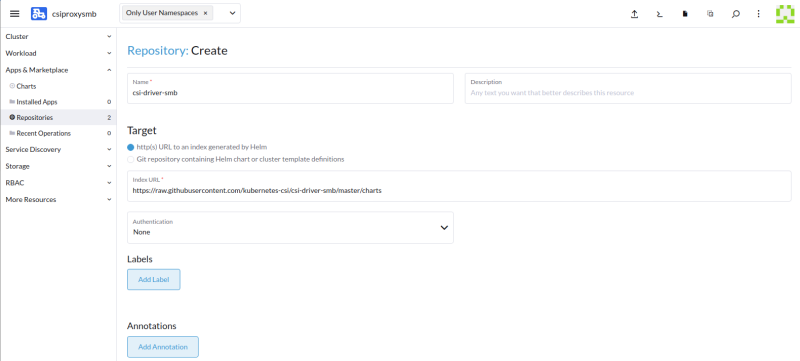
We need to setup the SMB helm chart repository. Here is the URL and the name that I provided.
Name:  csi-driver-smb
URL: https://raw.githubusercontent.com/kubernetes-csi/csi-driver-smb/master/charts
Install Helm chart
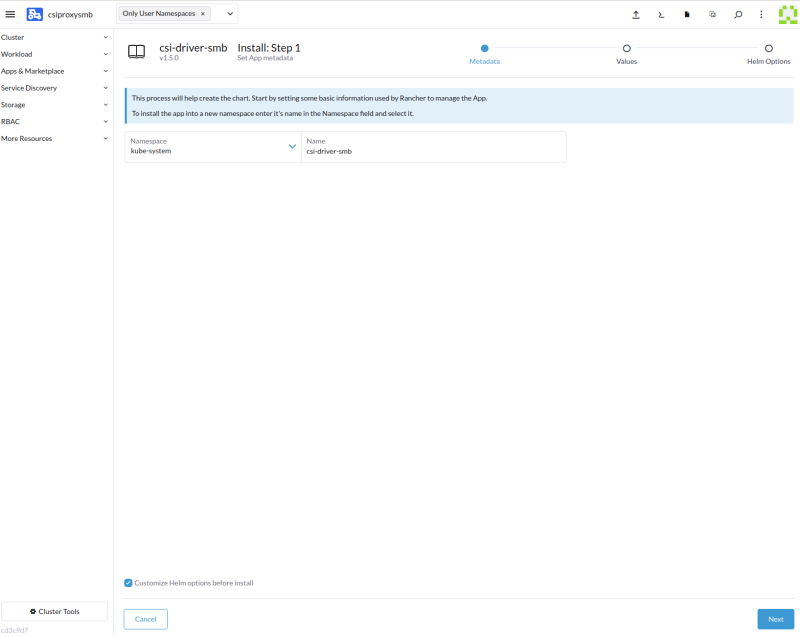
Install csi-driver-smb chart making sure to customize the yaml at the end to enable Windows. I am using Rancher so once it was added I just search for it.

Then I installed it using Rancher giving it the name csi-driver-smb and putting it in the kube-system namespace.
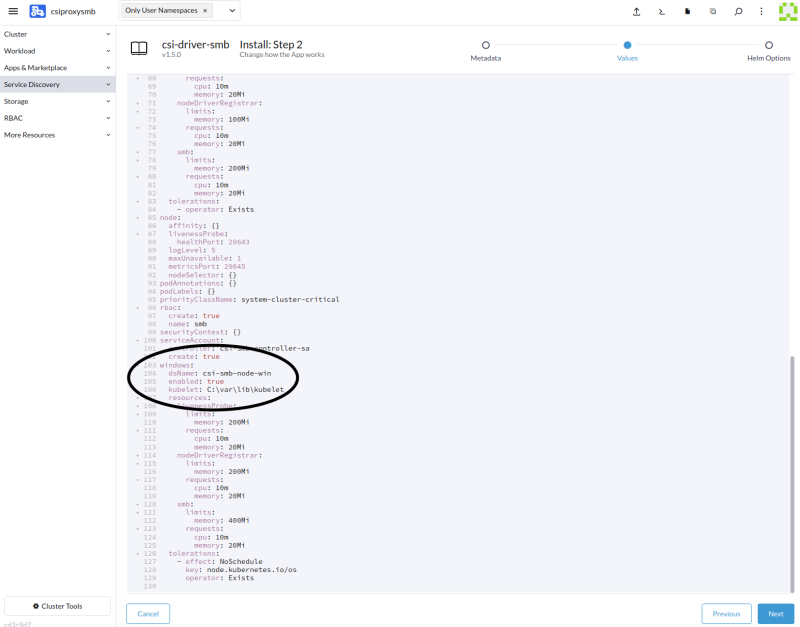
Customize the Values for the chart to enable Windows support.
windows:
  dsName: csi-smb-node-win
  enabled: true
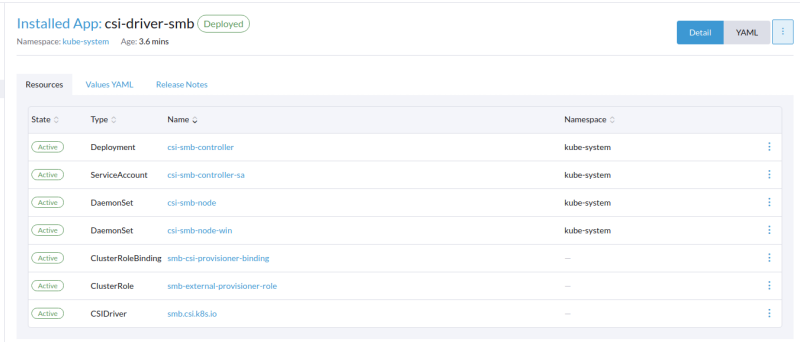
Validation of SMB Chart, Driver, and Proxy
Make sure that everything in the chart deployed succesfully.
Check the windows node on the os for the existance of the following directory once the deployment has finished:
C:\var\lib\kubelet\plugins\smb.csi.k8s.io

Create a SMB Server for testing
It looks like our SMB CSI Driver has been deployed succesfully, we now need a SMB server to test that it all works as expected. If you have one available then you can just use it. I like having everything repeatable and self-contained so I am going to deploy an SMB server inside of my cluster to use.
The first step is to add the secret:
kubectl create secret generic smbcreds --from-literal username=windows --from-literal password="IsAwesome"

Then deploy the SMB server using the manifest supplied by the CSI Driver repository:
kubectl create -f https://raw.githubusercontent.com/kubernetes-csi/csi-driver-smb/master/deploy/example/smb-provisioner/smb-server-lb.yaml
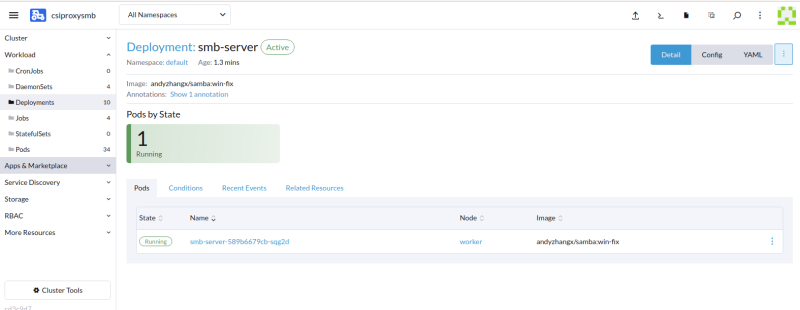
Here is the server succesfully deployed in Rancher.

Side Note
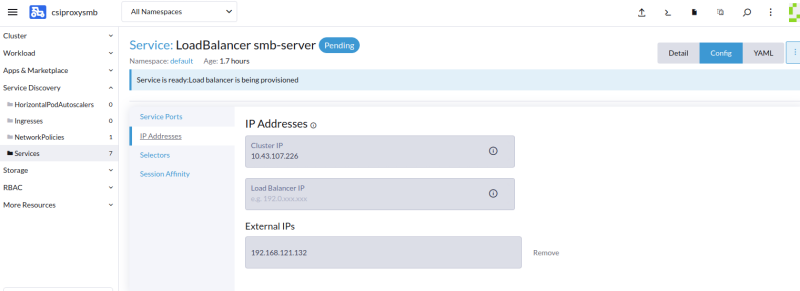
The default SMB server service will be smb-server.default.svc.cluster.local which will work for items running in the cluster. CSI Proxy is running on the Windows host and won’t have direct access. The default service we created is a load balancer type, so you should use that as the source in the storage class below. If you don’t have a load balancer because you are not running in a cloud, then the easiest way is to set an External IP on the smb-server service. To do that get the IP of the node running the smb-server service and replace the service name in the source with the node IP.
Here is an example:
Edit the smb-server service and add the node-ip as an external ip to the service before creating the storage class.
source: //<external-ip>/share
Create a Windows Storage Class
Now we can create our Windows storage class for our cluster.
apiVersion: storage.k8s.io/v1
kind: StorageClass
metadata:
  name: smb
provisioner: smb.csi.k8s.io
parameters:
  # On Windows, "*.default.svc.cluster.local" could not be recognized by csi-proxy
  source: "//smb-server.default.svc.cluster.local/share"
  # if csi.storage.k8s.io/provisioner-secret is provided, will create a sub directory
  # with PV name under source
  csi.storage.k8s.io/provisioner-secret-name: "smbcreds"
  csi.storage.k8s.io/provisioner-secret-namespace: "default"
  csi.storage.k8s.io/node-stage-secret-name: "smbcreds"
  csi.storage.k8s.io/node-stage-secret-namespace: "default"
volumeBindingMode: Immediate
mountOptions:
  - dir_mode=0777
  - file_mode=0777
  - uid=1001
  - gid=1001
Now deploy a Windows workload to test it.
---
kind: PersistentVolumeClaim
apiVersion: v1
metadata:
  name: pvc-smb
spec:
  accessModes:
    - ReadWriteMany
  resources:
    requests:
      storage: 1Gi
  storageClassName: smb
---
apiVersion: apps/v1
kind: Deployment
metadata:
  name: pwsh-smb
  labels:
    app: pwsh
spec:
  replicas: 1
  template:
    metadata:
      name: pwsh
      labels:
        app: pwsh
    spec:
      nodeSelector:
        "kubernetes.io/os": windows
      containers:
        - name: pwsh
          image: mcr.microsoft.com/powershell:lts-nanoserver-1809
          command:
            - "pwsh.exe"
            - "-Command"
            - "while (1) { Add-Content -Encoding Ascii C:\\mnt\\smb\\data.txt $(Get-Date -Format u); sleep 1 }"
          volumeMounts:
            - name: smb
              mountPath: "/mnt/smb"
              subPath: subPath
      volumes:
        - name: smb
          persistentVolumeClaim:
            claimName: pvc-smb
  selector:
    matchLabels:
      app: pwsh
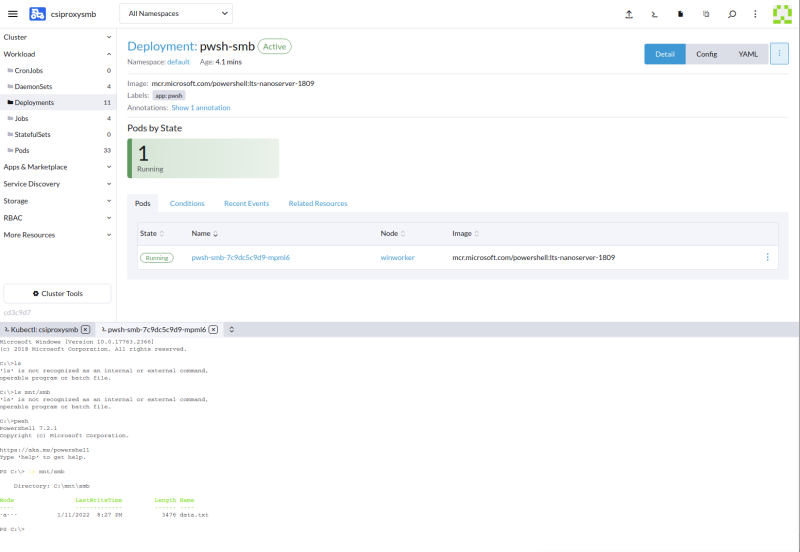
Then you can test by verifing that data.txt exists in the SMB share.
$ kubectl exec -it pwsh-smb-0  -- pwsh
C:/ $ ls mnt/smb

    Directory: C:\mnt\smb

Mode                 LastWriteTime         Length Name
----                 -------------         ------ ----
-a---           1/11/2022  8:27 PM           3476 data.txt
From Rancher UI, exec into the pwsh-smb pod and then:
$ pwsh
C:\ > ls mtn/smb

    Directory: C:\mnt\smb

Mode                 LastWriteTime         Length Name
----                 -------------         ------ ----
-a---           1/11/2022  8:27 PM           3476 data.txt
Wrapping Up
I hope you found this useful and it helps you get CSI Proxy up and functioning in your environment. There are a few other supported CSI drivers for CSI Proxy. The GCP, Azure, and VSphere are just a few that support it and hopefully other CSI drivers will add support to give Windows container users more options.
Thanks for reading,
Jamie
If you enjoy the content, then consider buying me a coffee.
