Azure Image Builder

Video is here.
@Pixel_Robots and @gregor_suttie put together an Azure Advent Calendar and I agreed to do a post and video on Azure Image Builder. Azure Image Builder is Microsoft’s answer to providing a “native” way to build virtual machine images in Azure. It is powered by Packer on the backend, but there are few nice features like the auto-deprovisioning and the handling of Windows restarts. If you are comfortable with creating ARM templates, then the syntax should help you feel at home.
Many people ask why you would want to build a virtual machine image when you can just run a provisioning script when creating the virtual machine. There are really two great examples of why you would want to pre-build your virtual machine images. The first one is if you are wanting to create images for the Azure Marketplace with your software installed and pre-configured. If you leverage a tool like Azure Image Builder or Packer, you can create a build pipeline that could be triggered on a new release or just ran on a timer to create unique images with your software and updates. The second reason is the startup time. If you are leveraging scale sets and your software installation and configuration takes 10 minutes, then that is just 10 more minutes you have to wait to scale. If you pre-build your images, later, you don’t pay that penalty when auto-scaling, and you can guarantee they are identical. Additionally, if you just built new images monthly, you can bake in operating system updates, which is always a good thing.
Enough with the background, let’s build our first image. I have been studying for the Certified Kubernetes Administrator exam, which requires doing a lot of repetitions and starting with a bare OS image just requires more bootstrapping before I can get to perform the tasks I need to practice. So I am going to use Azure Image Builder to build a virtual machine image with kubectl, kubeadm, kubelet, and curl already installed. We are going to be using Ubuntu 18.04 LTS as our base image.
Required Software
- Azure CLI
Setup
First thing we need to do is log in to the Azure using the CLI.
az login
Next, we will need to enable the Azure Image Builder provider.
az feature register --namespace Microsoft.VirtualMachineImages --name VirtualMachineTemplatePreview
In addition to the Image Builder provider, please make sure these others are enabled. They should be by default.
az provider show -n Microsoft.VirtualMachineImages | grep registrationState
az provider show -n Microsoft.Storage | grep registrationState
az provider show -n Microsoft.Compute | grep registrationState
az provider show -n Microsoft.KeyVault | grep registrationState
Let’s set some environment variables.
{
  imageResourceGroup=azbuilder-eus-rg
  location=EastUS
  subscriptionID=$(az account show --query "id" --output tsv)
  imageName=k8sBase
  runOutputName=k8s
}
Now we can create our resource group that will hold our image.
az group create -n $imageResourceGroup -l $location -o none
Now we need to assign the Azure Image Builder service access to our image resource group.
az role assignment create \
    --assignee cf32a0cc-373c-47c9-9156-0db11f6a6dfc \
    --role Contributor \
    --scope /subscriptions/$subscriptionID/resourceGroups/$imageResourceGroup \
    --output none
Image Builder template
Now we can create our Azure Image Builder template named baseKubernetes.json. The template follows the same standard as most ARM templates, we start off by defining our type, api version, location, and tags. The section that is of the most interest is the customize section. This section is where we define our commands to execute on the image. As you can see, I only have four steps: installBasePackages, addKubernetesRepo, addDockerRepo, and installKuberentesLibs. I could have made this a single step if I wanted, but breaking these out makes it a little easier to modify in the future.
{
    "type": "Microsoft.VirtualMachineImages/imageTemplates",
    "apiVersion": "2019-05-01-preview",
    "location": "<region>",
    "dependsOn": [],
    "tags": {
        "imagebuilderTemplate": "ubuntu1804"
    },
    "properties": {
        "buildTimeoutInMinutes": 80,
        "vmProfile": {
            "vmSize": "Standard_D1_v2"
        },
        "source": {
            "type": "PlatformImage",
            "publisher": "Canonical",
            "offer": "UbuntuServer",
            "sku": "18.04-LTS",
            "version": "18.04.201912050"
        },
        "customize": [
            {
                "type": "Shell",
                "name": "installBasePackages",
                "inline": [
                    "sudo apt-get update",
                    "sudo apt-get install -y apt-transport-https curl ca-certificates gnupg-agent software-properties-common"
                ]
            },
            {
                "type": "Shell",
                "name": "addKubernetesRepo",
                "inline": [
                    "curl -s https://packages.cloud.google.com/apt/doc/apt-key.gpg | sudo apt-key add -",
                    "echo \"deb https://apt.kubernetes.io/ kubernetes-xenial main\" | sudo tee -a /etc/apt/sources.list.d/kubernetes.list"
                ]
            },
            {
                "type": "Shell",
                "name": "addDockerRepo",
                "inline": [
                    "curl -fsSL https://download.docker.com/linux/ubuntu/gpg | sudo apt-key add -",
                    "sudo add-apt-repository \"deb [arch=amd64] https://download.docker.com/linux/ubuntu $(lsb_release -cs) stable\""
                ]
            },
            {
                "type": "Shell",
                "name": "installKuberentesLibs",
                "inline": [
                    "sudo apt-get update",
                    "sudo apt-get install -y docker-ce=18.06.1~ce~3-0~ubuntu kubelet=1.16.4-00 kubeadm=1.16.4-00 kubectl=1.16.4-00",
                    "sudo apt-mark hold kubelet kubeadm kubectl docker-ce"
                ]
            }
        ],
        "distribute": [
            {
                "type": "ManagedImage",
                "imageId": "/subscriptions/<subscriptionID>/resourceGroups/<rgName>/providers/Microsoft.Compute/images/<imageName>",
                "location": "<region>",
                "runOutputName": "<runOutputName>",
                "artifactTags": {
                    "source": "azVmImageBuilder",
                    "baseosimg": "ubuntu1804",
                    "kubernetesVersion": "1.16.4"
                }
            }
        ]
    }
}
You will notice that we have a few place holder values through the template. Feel free to alter these, or you can simply execute the following snippet to replace those with the environment variables we created earlier.
{
  sed -i -e "s/<subscriptionID>/$subscriptionID/g" baseKubernetes.json
  sed -i -e "s/<rgName>/$imageResourceGroup/g" baseKubernetes.json
  sed -i -e "s/<region>/$location/g" baseKubernetes.json
  sed -i -e "s/<imageName>/$imageName/g" baseKubernetes.json
  sed -i -e "s/<runOutputName>/$runOutputName/g" baseKubernetes.json
}
Now we should have a template with all values populated. Now we are getting into some of the odd, to me, behavior. We need to upload the template to Azure. Once it is uploaded, we will need to wait a few minutes to execute it.
az resource create \
    --resource-group $imageResourceGroup \
    --properties @baseKubernetes.json \
    --is-full-object \
    --resource-type Microsoft.VirtualMachineImages/imageTemplates \
    -n baseKubernetes
After waiting a few minutes, all we need to do is run it.
az resource invoke-action \
     --resource-group $imageResourceGroup \
     --resource-type  Microsoft.VirtualMachineImages/imageTemplates \
     -n baseKubernetes \
     --action Run
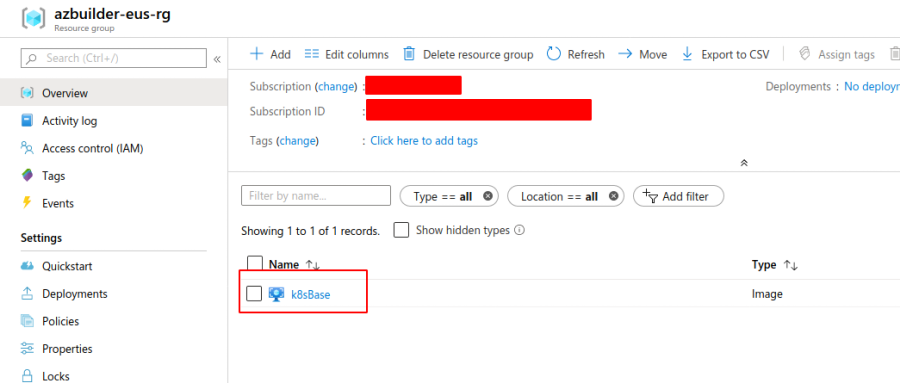
Once this completes running, we should have an image being displayed in the azbuilder-eus-rg that we created earlier.
Testing our new image
Let’s create a VM from that image and see if the correct versions of our software are installed and configured to be pinned.
Now lets SSH into that VM.
ssh aibuser@$(az vm show -g $imageResourceGroup -n k8sNode1 -d --query "publicIps" --output tsv)
Now we can execute a few tests.
$ kubectl version
Client Version: version.Info{Major:"1", Minor:"16", GitVersion:"v1.16.4", GitCommit:"224be7bdce5a9dd0c2fd0d46b83865648e2fe0ba", GitTreeState:"clean", BuildDate:"2019-12-11T12:47:40Z", GoVersion:"go1.12.12", Compiler:"gc", Platform:"linux/amd64"}
$ kubeadm version
kubeadm version: &version.Info{Major:"1", Minor:"16", GitVersion:"v1.16.4", GitCommit:"224be7bdce5a9dd0c2fd0d46b83865648e2fe0ba", GitTreeState:"clean", BuildDate:"2019-12-11T12:44:45Z", GoVersion:"go1.12.12", Compiler:"gc", Platform:"linux/amd64"}
$ kubelet --version
Kubernetes v1.16.4
$ docker version
Client:
 Version:           18.06.1-ce
 API version:       1.38
 Go version:        go1.10.3
 Git commit:        e68fc7a
 Built:             Tue Aug 21 17:24:51 2018
 OS/Arch:           linux/amd64
 Experimental:      false
$ sudo apt-mark showhold
docker-ce
kubeadm
kubectl
kubelet
All those tests look great. We could now use this image to create Kubernetes v1.16.4 clusters.
Cleanup
Here is how we can clean up the template if needed.
 az resource delete \
     --resource-group $imageResourceGroup \
     --resource-type Microsoft.VirtualMachineImages/imageTemplates \
     -n baseKubernetes
Conclusion
Hopefully, you had success with these steps and feel comfortable embarking on your own journey to build virtual machine images using Azure Image Builder. I have a repo that you can just pull down the template from, and it has all the same commands as this post if you would instead not start from scratch.
I hope you found this useful, and I have a few follow-up posts planned, so please stay tuned.
Thanks,
Jamie
If you enjoy the content, then consider buying me a coffee.